Faster is better. That should be Oracle Primavera’s mantra. Well, in this case it is! Exporting Primavera P6 data to Excel could not be faster & easier with this quick tip.
Getting Primavera P6 Activity data into Excel is essential. Excel’s data crunching, grouping, pivoting and filtering is just so much easier to use than Primavera P6’s. Even generating S-curves and graphs is better in Excel than in Primavera P6. So that’s why you need to know this quick tip for exporting from Primavera P6 to Excel.
When exporting data to Excel from P6, it can take a while to choose which columns to export and what filters to use. Here’s how to export your Primavera P6 Activities list in less in just a few clicks.
How To Quickly Export from Primavera P6 to Excel
Here are the steps for a super-fast export from P6 to XLS.
Step 1 – Open an Activities Layout
Go ahead and open your favourite Primavera P6 layout that has the appropriate columns and filters set already for your export.
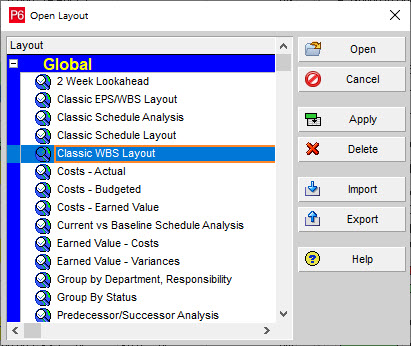
Here we’re going to use our favourite layout – Classic WBS layout.
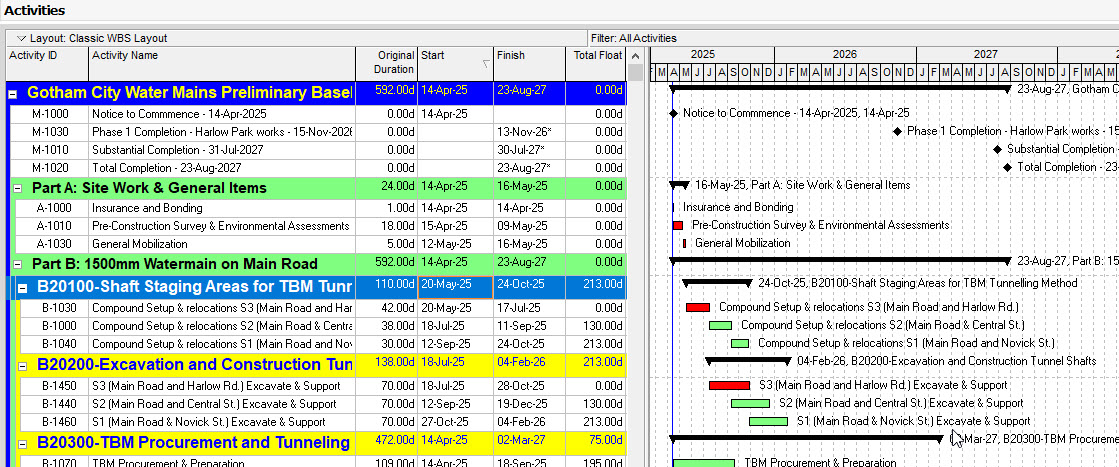
Step 2 – Use the “Export to Excel” right-click shortcut
Here’s the magic! Not many people know this trick.
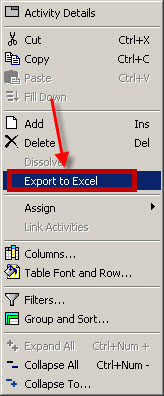
Right-click on any Activity on-screen in P6. Choose “Export to Excel” from the right-click menu.
Step 3 – Save the Excel file
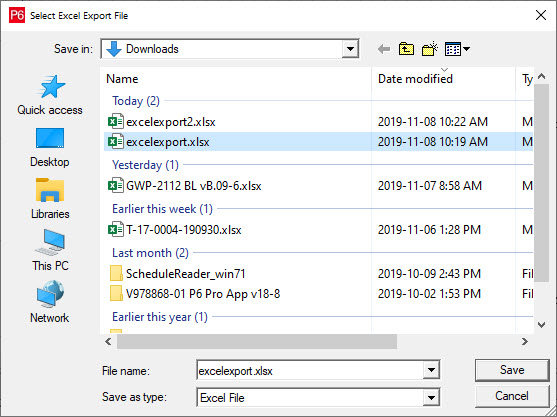
Choose the appropriate folder and save the Excel file with your P6 data in it.
Step 4 – Open and Edit
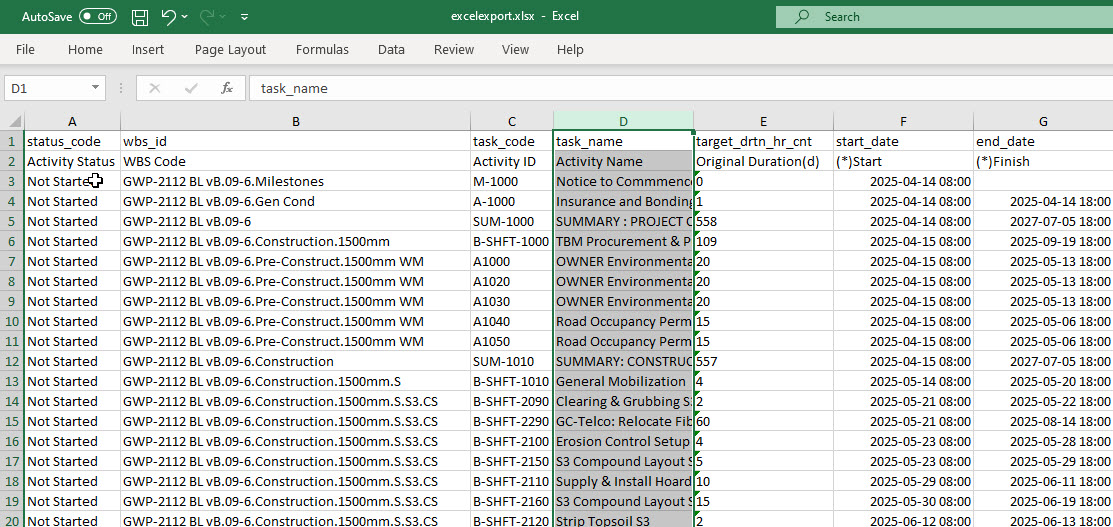
Find and open the .XLS file. Voila! Primavera P6 data exported to Excel with just few clicks!
This Shortcut Works With P6 Filters
I’ve already told you how some filters are ignored when you export P6 data to Excel the using the File->Export method.
But when you use this right-click export to Excel tip, if you have a P6 filter on, then only those filtered Activities will be exported to Excel.
Nice, right?
Conclusion
This is one of those times where a shortcut can save you a significant amount of time. Using the File -> Export avenue to export data to Excel can take a some time and a lot of clicking to choose columns, filters and basically setup an reusable Excel export template.
The right-click option is definitely faster.
However, if you need to export other Primavera data, like Relationships, Expenses, Resource Assignments, etc., then you’ll have to use the File -> Export command as the right-click command only exports the Activities list.
For some reason, the right-click “Export to Excel” shortcut is only available from the Activities screen.
AND it’s only available on the right-click menu, not the Edit menu…. so you’ll have to practice it a few times until it becomes habit.
Things for you to try
- If you export / import Activities data from Excel regularly, set up an Activities Layout specifically for that purpose. Set the appropriate columns and filters (*see reference to gotcha below) in the Layout. Then you can quickly use the right-click “Export to Excel” shortcut to do the deed.
What else you should know
- Filters Gotcha: rolling date filters do not work when exporting data to Excel in general. So be sure your layout does not use a rolling date filters. Here’s a workaround to that gotcha.

