On most construction projects Primavera P6 schedules are presented to stakeholders in PDF file format due to the obvious formatting advantage that PDF offers. Unfortunately, when reviewing a P6 Gantt Chart printed to PDF, there is very little information available about the logic relationships between activities in the schedule. In this tutorial I’ll shod you the steps to follow to create an Activity Predecessors Report in Primavera P6 that can be included in a Schedule Basis Document or issued along with a schedule to help stakeholders gain a better understanding of the relationships between activities when reviewing a project schedule.
ALTERNATIVE METHODS
There are a few methods of showing activities relationships in P6 but are they very effective?
A couple of examples are shown below.
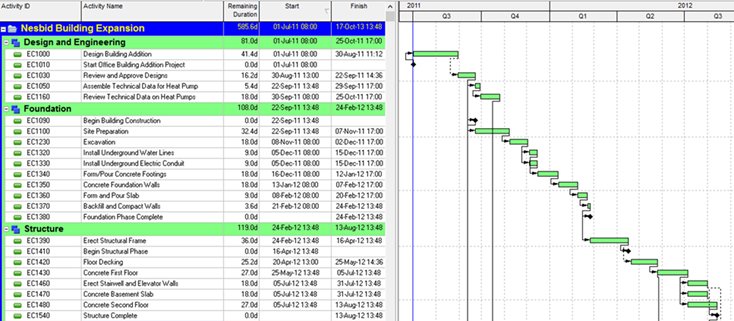
Figure 1a shows a Gantt chart with relationship lines enabled. Although we can see the relationships line, you would probably agree with me that tracing logic lines across different WBS elements on Gantt chart is a tedious process; especially if the Gantt chart timescale is compressed so that the width of the chart fits on a single page. Tracing predecessors is not really possible.
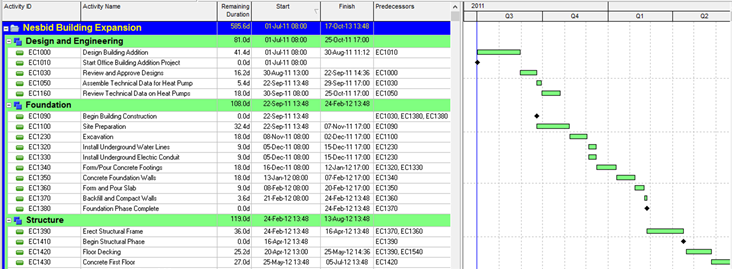
Figure 1b shows a Gantt chart with the Predecessors column displayed. Notice that this column only shows the Activity IDs of predecessor activities without the activity names. Also when an activity has multiple predecessors, it would most likely require a very wide Predecessors column which will distort our Gantt chart format.
It is obvious that the two examples above do not do a very good job of helping one to understand the logic relationships between activities in a schedule hence the need to use the method outlined in this tutorial.
Creating a Primavera P6 Predecessors Report
STEP 1
From the left side navigational toolbar, click on Reports and this will open the Reports interface (Figure 3).

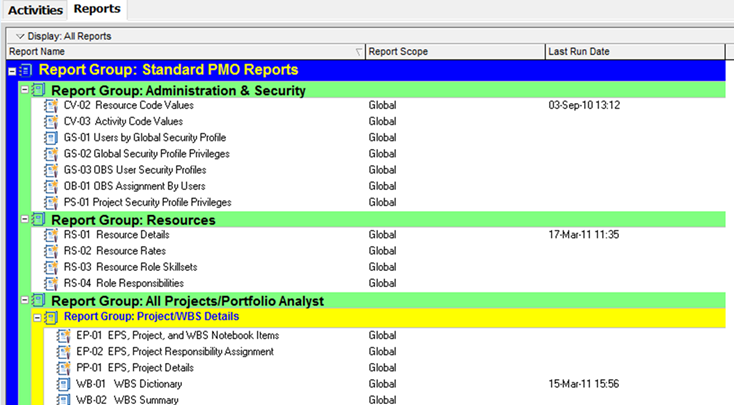
Note that you can also open this Reports interface by going through Tools > Reports > Reports.
STEP 2
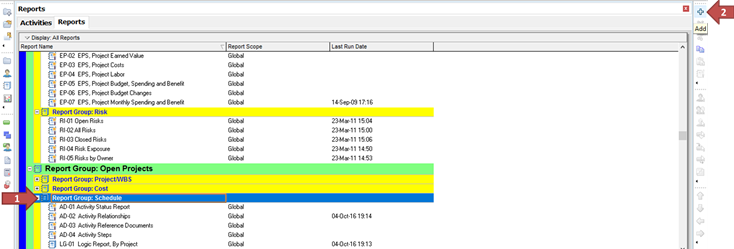
Select the Report Group under which you want to save the report we are going to create (Open Projects > Schedule in this example as shown in figure 4 and click on Add from the right navigational toolbar. This will open the Report Wizard dialog.
STEP 3
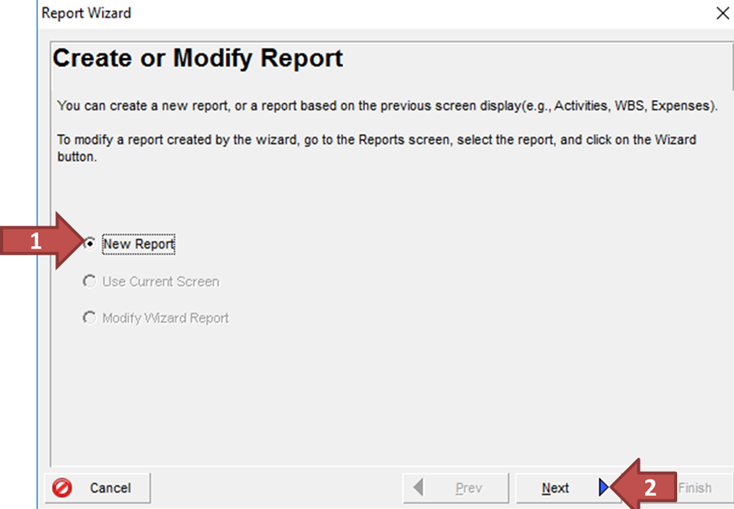
Under Create or Modify Report, ensure that New Report checkbox is ticked and then click on the Next button to open the next prompt.
STEP 4
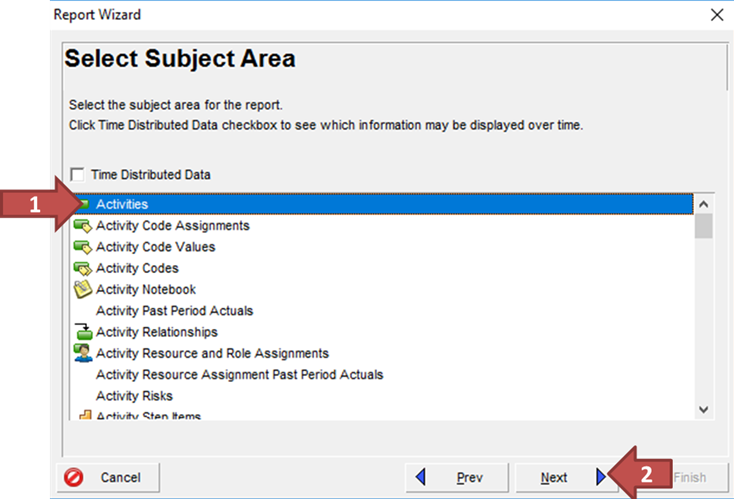
Under Select Subject Area, select Activities from the list and then click on the Next button to open the next prompt.
STEP 5
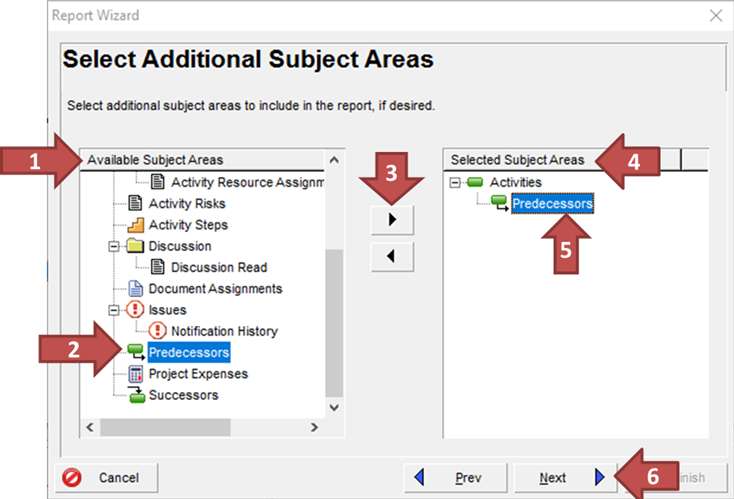
Under Select Additional Subject Areas, scroll down the list in the Available Subject Areas and select Predecessors and then click on the Move Right button (Figure 7 #3). This will move Predecessors to the Selected Subject Areas and place it as a subset of Activities. Now click on the Next button to open the next prompt.
STEP 6
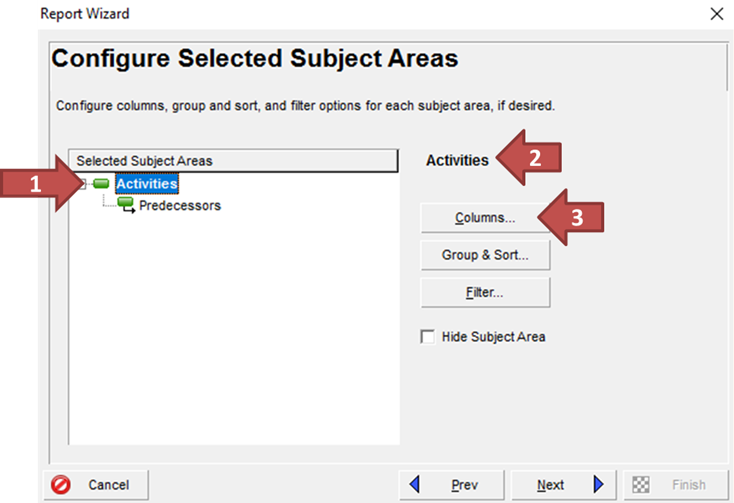
Under Configure Selected Subject Areas, select Activities and ensure that the message Activities is displayed as shown in Figure 8a #2 to confirm you have made the right selection. Then click on Columns button to open the Columns dialog.
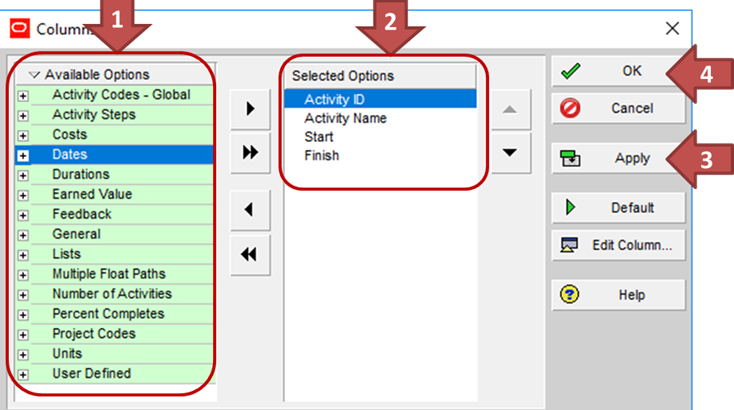
From the Available Options section search and add the fields: Activity ID, Activity Name, Start & Finish to the Selected Options section. Click on Apply and OK buttons to return to the Configure Selected Subject Areas prompt.
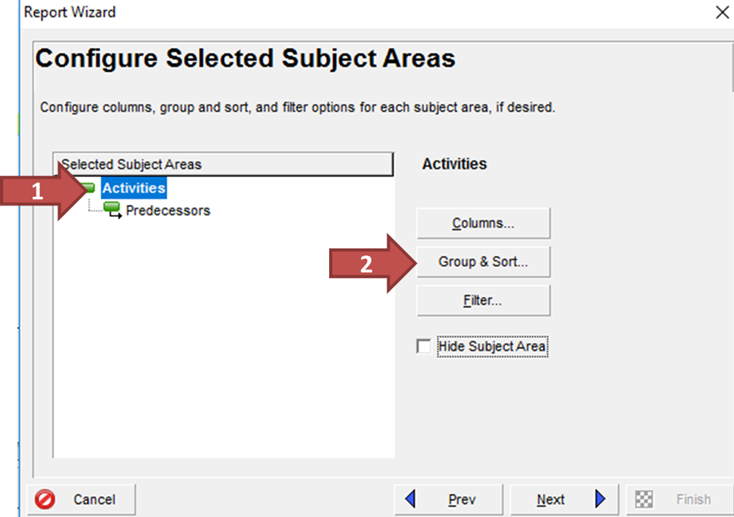
Still with Activities selected click on Group & Sort button to open the Group and Sort dialog.
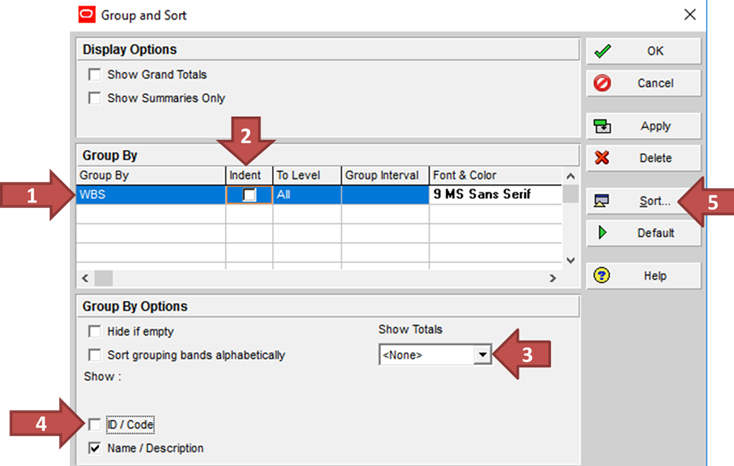
In the Group By section, select WBS (or the activity code used for grouping in your Gantt chart) under the Group By column, untick the Indent checkbox. In the Group By Options, select <None> from the dropdown box & untick the ID/Code checkbox. Now click the Sort button to open the Sort dialog.
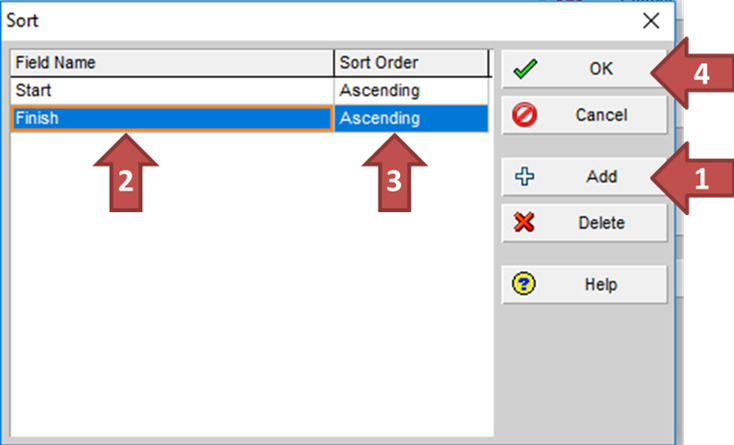
Click on Add button, from Field Name dropdown box, select Start and from Sort Order dropdown box, select Ascending. Repeat #1 to #3 but this time select Finish from the Field Name dropdown box and then click the OK button to return to the Group and Sort dialog.
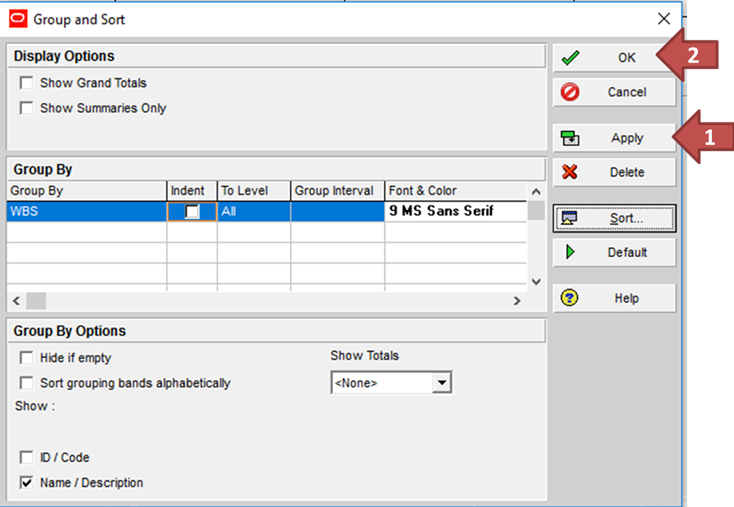
Click the Apply and OK buttons to return to the Configure Selected Subject Areas prompt.
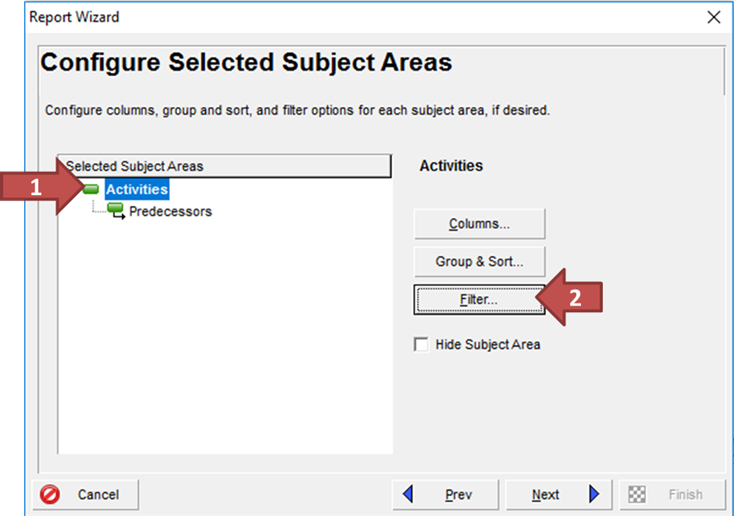
Still with Activities selected click on Filter button to open the Filter dialog.
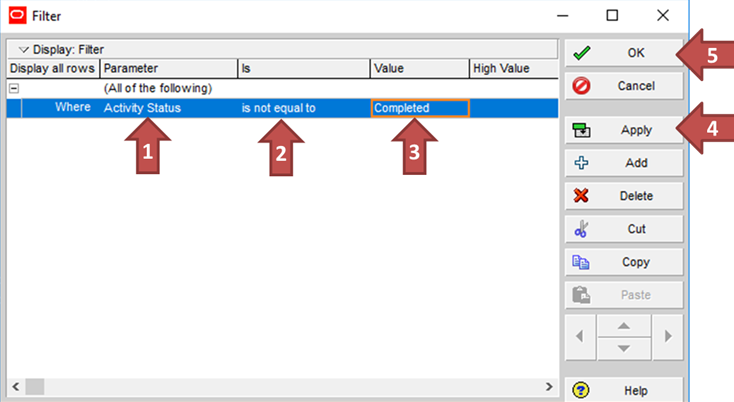
Under Parameter column, select Activity Status from the dropdown box; under Is column, select is not equal to from the dropdown box; under select Completed from Value dropdown box.
I have made these selections because I want to filter out completed activities so that focus of the report is on outstanding activities. Click the Apply and OK buttons to return to the Configure Selected Subject Areas prompt.
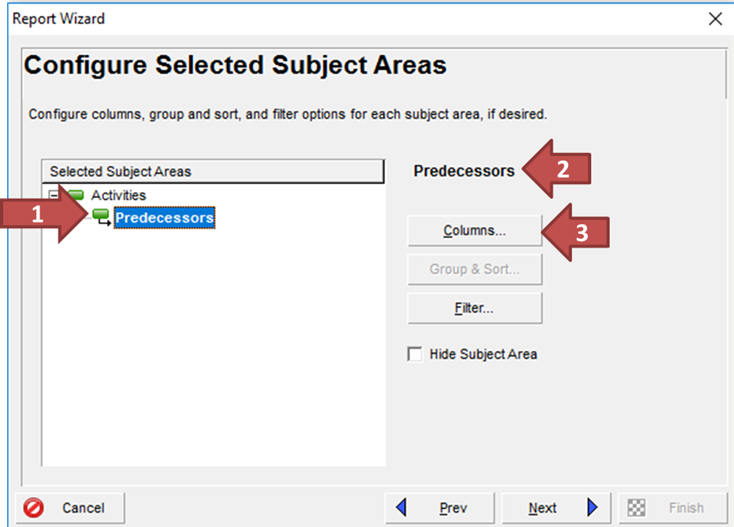
Under Configure Selected Subject Areas, select Predecessors and ensure that the message Predecessors is displayed as shown in figure 8i #2 to confirm you have made the right selection. Then click on Columns button to open the Columns dialog.
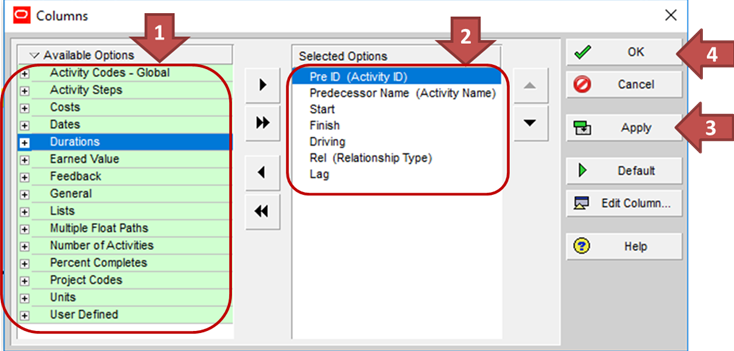
From the Available Options section search and add the fields: Activity ID (renamed Pre ID), Activity Name (renamed Predecessor Name), Start, Finish, Driving, Relationship Type (renamed Rel) & Lag to the Selected Options section. Click on Apply and OK buttons to return to the Configure Selected Subject Areas prompt.
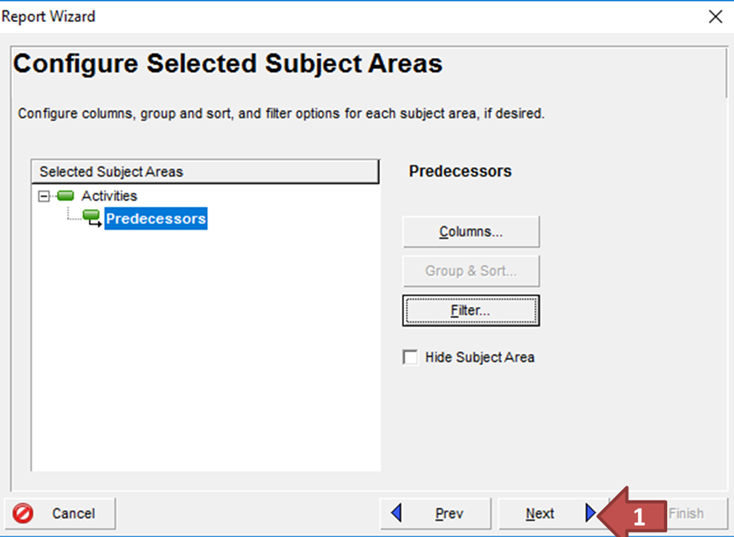
Now click on the Next button to open the next prompt.
STEP 7
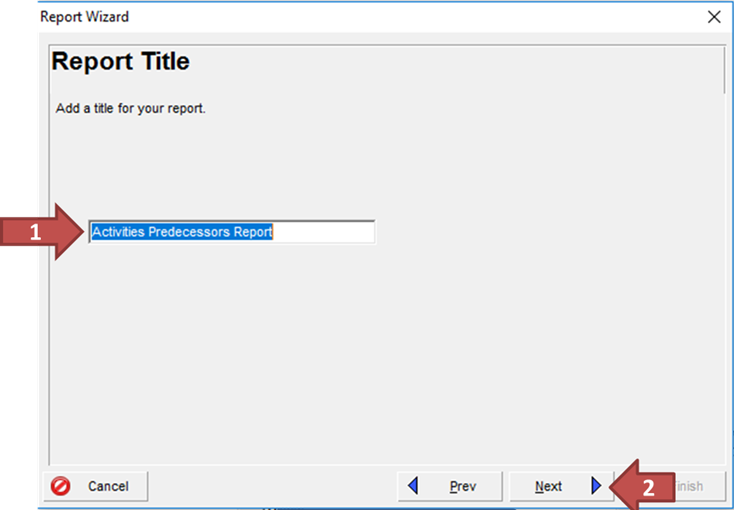
Under Report Title, type Activities Predecessors Report in the textbox and then click on the Next button to open the next prompt.
STEP 8
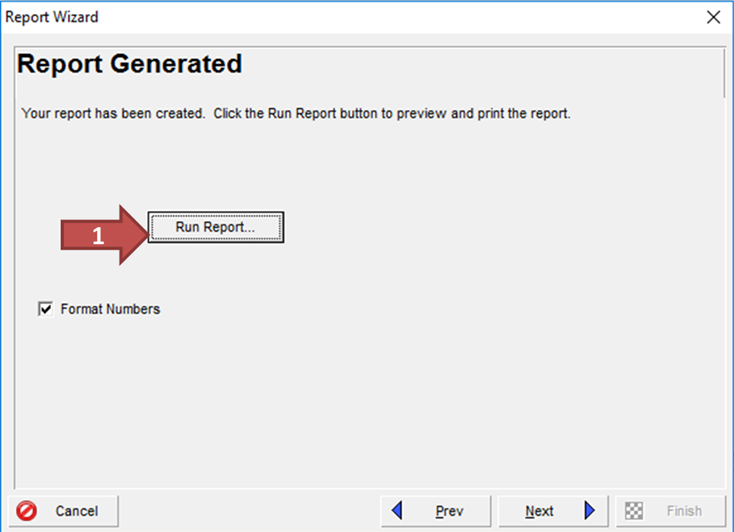
Under Report Generated, click Run Report button to open the Run Report dialog.
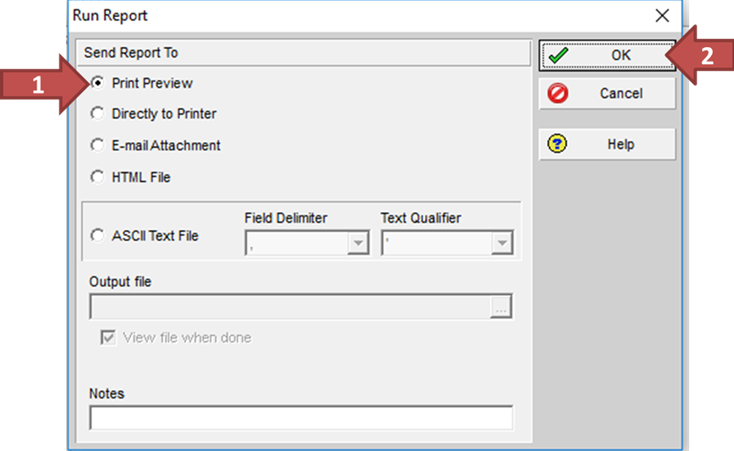
Under Send Report To section, Select Print Preview option and click the OK button to open the report (though there are 4 options to choose from, my preference is Print Preview as this gives me the chance to preview the report before printing to my preferred format).
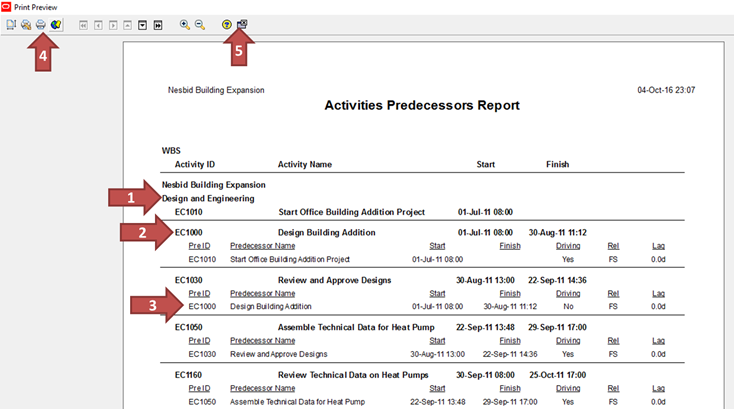
The Print Preview shows the report is formatted how I want it.
The report is grouped by WBS (figure 10c #1) and Activities (figure 10c #2) which have 1 tab of indent so that they appear under their WBS are sorted by Start > Finish while Activities Predecessors (figure 10c #3) have 2 tabs of indent so that they appear under their successor activity.
Click on the Print icon to print to pdf, this assumes you have a pdf printer set-up or you will be using Microsoft Print to pdf (pdf file attached for your review). Once you are happy with the report format, click on the Close button to close the Print Preview and return to the Report Generated prompt.
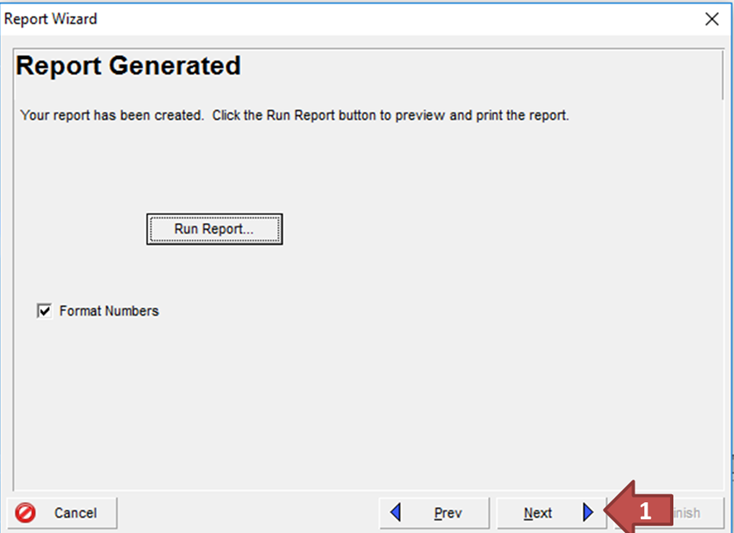
Click on the Next button to open the next prompt.
STEP 9
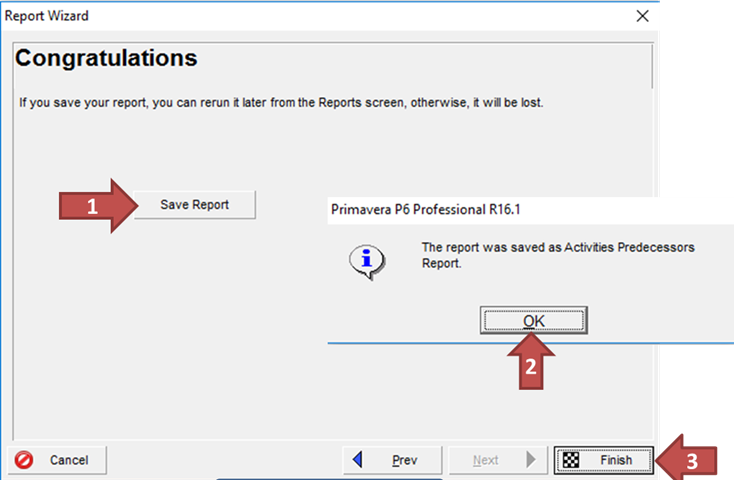
Under Congratulations, click Save Report button to save the Report.
A message box will popup confirming that the report has been saved using the Report Title assigned in Step 7, click OK to close the message box, then click on Finish to close the Report Wizard dialog and return to the Report interface.
STEP 10
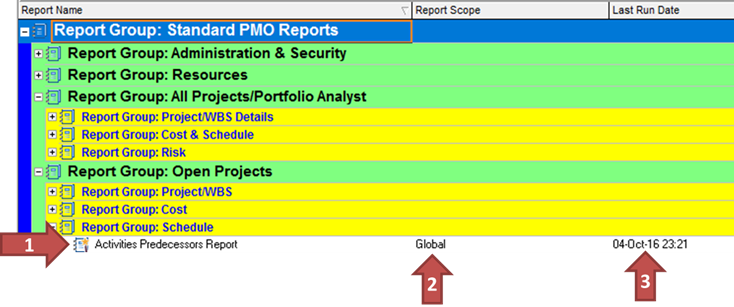
You should see the newly created Activities Predecessors Report under the report groupings selected in Step 2 (i.e. Open Projects > Schedule). Under Report Scope column you should see Global because by default P6 makes reports available to all projects but you can change it Current Project (my preference is to leave as Global so that I can use same report for different projects). Under Last Run Date you would see the last time you ran the report.
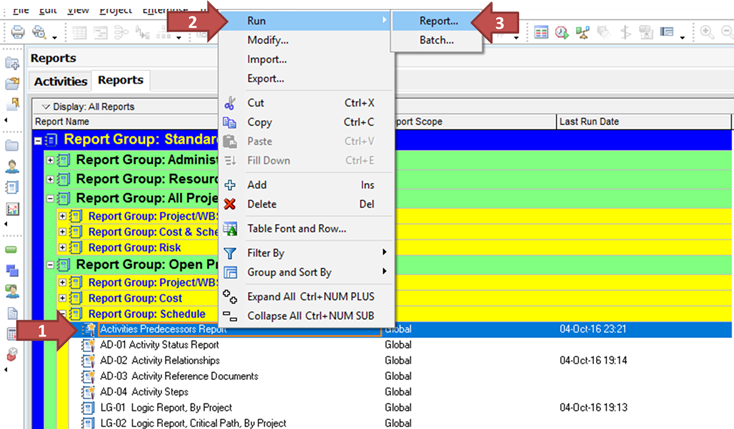
To run the report in future, select the report, right-click and select Run and then Report.
FINAL WORDs
The tutorial has been deliberately simplified to make it easy for beginners to understand and was developed using Primavera P6 v16.1 but it will work in all versions of P6. You can use one of the sample projects that ships with P6 to test your Precessors Report. Let us know what you think using the comment box below.

![How To Generate a Predecessors Report in P6 [Tutorial]](https://www.planacademy.com/wp-content/uploads/2016/10/bigstock-Business-and-time-management-c-119068331.png)
